In CRM 2016, when turbo forms are enabled, pretty much any unsupported code will break. Usually it’s easy enough to add a ‘parent.’ To the front of any unsupported code, however if you’re using the code from my blog post on how to do this in CRM 2013, there’s a few tricky things that need to be updated as well.

I’m not going to go into detail about how the code works, instead I’m just showing what the updated code should be. If you want the extra details check out the previous blog posts on how to do this for CRM 2013 and CRM 2011.

To get this working in CRM 2016 with Turbo Forms, you’ll need to append all the unsupported references with ‘parent.’. Also, you should change the ‘var parent’ to something else like ‘var parentObj’ so it doesn’t overwrite the DOM parent.

To make this easier, I’ve declared a new crmWindow variable, which makes use of the internal method of checking if turbo forms is enabled, so this code will work in CRM 2016 whether turbo forms is enabled or not. This variable also replaces the ‘context’ variable in the old code, which was just a reference to ‘this’ (the current window).

The full updated code is below, with changes to the CRM 2013 code being highlighted:

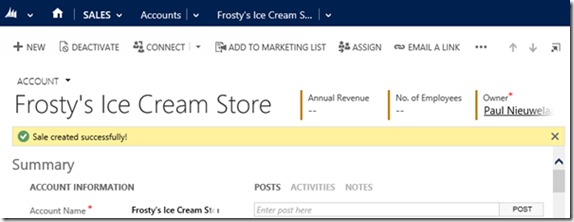
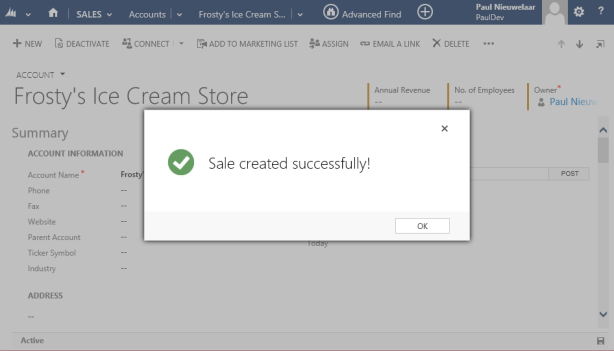
//filters an add existing lookup view (N:N)
function addExistingFromSubGridCustom(gridTypeCode, gridControl, crmWindow, fetch, layout, viewName) {
    var viewId = "{1DFB2B35-B07C-44D1-868D-258DEEAB88E2}"; // a dummy view ID
    var relName = gridControl.GetParameter("relName");
    var roleOrd = gridControl.GetParameter("roleOrd");

    //creates the custom view object
    var customView = {
        fetchXml: fetch,
        id: viewId,
        layoutXml: layout,
        name: viewName,
        recordType: gridTypeCode,
        Type: 0
    };

    var parentObj = crmWindow.GetParentObject(null, 0);
    var parameters = [gridTypeCode, "", relName, roleOrd, parentObj];
    var callbackRef = crmWindow.Mscrm.Utilities.createCallbackFunctionObject("locAssocObjAction", crmWindow, parameters, false);

    //pops the lookup window with our view injected
    crmWindow.LookupObjectsWithCallback(callbackRef, null, "multi", gridTypeCode, 0, null, "", null, null, null, null, null, null, viewId, [customView]);
}

//filters the Contact N:N lookup view from Account to show only Pauls!!
function filterAddExistingContact(gridTypeCode, gridControl, primaryEntity) {
    var crmWindow = Xrm.Internal.isTurboForm() ? parent.window : window;

    if (primaryEntity != "account") {
        crmWindow.Mscrm.GridRibbonActions.addExistingFromSubGridAssociated(gridTypeCode, gridControl); //default button click function
        return;
    }

    //fetch to retrieve filtered data
    var fetch = "<fetch version='1.0' output-format='xml-platform' mapping='logical' distinct='false'>" +
        "  <entity name='contact'>" +
        "    <attribute name='fullname' />" +
        "    <order attribute='fullname' descending='false' />" +
        "    <filter type='and'>" +
        "      <condition attribute='statecode' operator='eq' value='0' />" +
        "      <condition attribute='firstname' operator='eq' value='Paul' />" +
        "    </filter>" +
        "  </entity>" +
        "</fetch>";

    //columns to display in the custom view (make sure to include these in the fetch query)
    var layout = "<grid name='resultset' object='1' jump='contactid' select='1' icon='1' preview='1'>" +
        "  <row name='result' id='contactid'>" +
        "    <cell name='fullname' width='300' />" +
        "  </row>" +
        "</grid>";

    addExistingFromSubGridCustom(gridTypeCode, gridControl, crmWindow, fetch, layout, "Filtered Contacts");
}

Every time I have to do something with activities in CRM it ends up taking way longer than expected. Unlike most entities in CRM, activities have a lot of unusual relationships and field types, not to mention all the behind the scenes processes which tend to not like when you introduce your own custom logic.

In this blog post I want to simply look at party list fields, and how to read and update the field values.

An activity partylist field is like the To, CC, BCC fields on an email – they can contain multiple entity references, and they can also contain different entity types (contact, user etc). When we for example do a retrieve on the email entity using the SDK, the ‘to’ field is of type EntityCollection.

If we break this down, each Entity in the collection is an ‘activityparty’. The Activity Party entity is the intercept entity for all the activity party list fields. Activity parties are not only used for the party list fields however, they’re also used for the regarding and appointment organizer etc.

So what fields do we get from each of the activity party Entity objects?

If we break it down, it has 3 main fields. The partyid, which is the actual EntityReference to the contact, user, account etc which is being referenced. The addressused, which is only really used when emails or appointments are tracked from outlook; this is the actual email address of the recipient that CRM used to match it to a record. Finally there is a field called ispartydeleted, which simply tells us if the record behind the activity party has been deleted; since CRM does not delete the activity party, nor does it clear the partyid, this is the only way of knowing that the record actually exists (without trying to retrieve it or something).

Entity email = _sdk.Retrieve("email", emailId, new ColumnSet("to"));

EntityCollection to = email.GetAttributeValue("to");
if (to != null)
{
    to.Entities.ToList().ForEach(party =>
    {
        EntityReference partyId = party.GetAttributeValue("partyid");
        bool isDeleted = party.GetAttributeValue("ispartydeleted");
        string addressUsed = party.GetAttributeValue("addressused");

        // Do something...
    });
}


When you’re creating an activity party, you need to set the partyid and/or the addressused. You must set at least one, and they cannot be null – so make sure not to add it to the property bag if there’s no value. CRM will throw an error if neither attribute is set, or if you explicitly set one of the attributes to null.

If you specify an addressused and not a partyid, the activity party will be ‘unresolved’ on the activity. It will display as just the email address, with a red font.

You don’t need to do an SDK Create or Update request on activity parties, just update the EntityCollection and add it back into the parent activity ‘to’ or ‘cc’ field etc and then update/create the activity – CRM will take care of creating or updating the parties.

If you’re copying activity parties from one activity to another, or from one partylist field to another, make sure to remove the activitypartyid from the Entity objects, as these are unique for each party. Simply leave this field out of the attributes list so that CRM will create a new activity party.

// Create a new activity party linked to a contact
Entity party1 = new Entity("activityparty");
party1["addressused"] = "some@email.com";
party1["partyid"] = new EntityReference("contact", contactId);

// Create a new unresolved activity party
Entity party2 = new Entity("activityparty");
party2["addressused"] = "unresolved@email.com";

// Create a new EntityCollection and add the 2 parties
EntityCollection to = new EntityCollection();
to.Entities.Add(party1);
to.Entities.Add(party2);

// Create an email with the EntityCollection
Entity email = new Entity("email");
email["subject"] = "Test Party Lists";
email["to"] = to;

_sdk.Create(email);


If you want to delete an activity party, simply remove it from the EntityCollection. CRM will take care of deleting the activity party record behind the scenes. This example removes the unresolved and deleted parties from the ‘to’ field.

Guid emailId = new Guid("1EFCBB18-F3B6-E411-80BA-00155D048D48");
Entity email = _sdk.Retrieve("email", emailId, new ColumnSet("to"));

EntityCollection to = email.GetAttributeValue("to");
if (to != null)
{
    to.Entities.ToList().ForEach(party =>
    {
        EntityReference partyId = party.GetAttributeValue("partyid");
        bool isDeleted = party.GetAttributeValue("ispartydeleted");
        string addressUsed = party.GetAttributeValue("addressused");

        if (isDeleted || partyId == null)
        {
            to.Entities.Remove(party);
        }
    });
}

email["to"] = to;

_sdk.Update(email);

CRM by default doesn’t allow us to create our own custom fields using rich text or HTML, similar to the email Description out of the box. However, if we’re building forms that push data to a website dynamically, we may need the ability to build some HTML in CRM. In the past there’s been a few solutions available to do this in CRM. Some are more unsupported than others (e.g. hacking into a field on the form and converting it into a rich text editor).

One of the nicer solutions involves embedded a web resource on the form, and then taking the HTML generated by the web resource, and updating a field on the parent form. A good example of this, and the baseline of my solution is shown here, by Thomas Unzeitig: http://soho.at/wp/create-rich-text-textarea-microsoft-crm-2013-forms.

This solution is using CKEditor, which is a tidy HTML/JavaScript based html editor, which means we can upload all of the web resources into a CRM solution and keep everything packaged nicely.

To download my solution, check out the project on CodePlex: https://crmhtmleditor.codeplex.com/

I have made the solution dynamic enough so that it can be dropped into any form by simply embedding the html editor web resource into the form, and passing in the field name to store the HTML data.

You can also set the Formatting to display the number of rows required, and to disable the iframe scrolling and border for a nicer look and feel. The HTML Editor will automatically expand to fill the space available inside the iframe, however big you choose to make it.

You can also pass a default value into the HTML editor, which will be applied when there is no existing value (e.g. for new records). This can be useful when you want to ‘guide’ users into entering the HTML in a specific format, rather than just letting them loose.

The default value needs to be encoded, and then included in the custom parameters of the web resource. You can get the encoded URL string from the following webpage by pasting in some HTML and then clicking ‘Encode’: http://meyerweb.com/eric/tools/dencoder. Copy the encoded string and add it to the web resource parameters after the field value, e.g. field=new_html&defaultValue=%3Cb%3EHello%3C%2Fb%3E

The defaultValue parameter is optional, and if not specified, the HTML editor will simply display nothing initially.

Next we can preview our form and see that the html editor just works. We can see the default value being applied, including the ‘bold’ styling, and our basic editing tools are available.

The data from the HTML editor will be saved to the ‘HTML’ field every time you click out of the iframe. This means you don’t need to manually ‘save’ the HTML, it will just automatically keep up to date by itself. After we’ve saved the form, we can reload the page and the HTML editor will load up the HTML from our field automatically.

We can now hide that HTML field (as long as it remains on the form), and the HTML editor will continue to work and look pretty.

The buttons/editing tools available in this solution are based on the ‘Basic’ package provided by CKEditor. This is because the basic package seemed to meet our particular needs as we didn’t require a full blown HTML editor, just some basic rich text editing tools. This also means the entire solution is only 17 web resources.

If however you do require any additional editing tools, you can check out the CKEditor download page and create yourself a custom download package, and then just be sure to upload the missing web resources using the same publisher prefix, and same file names, then update the config.js file to load those plugins as well.

Note that this solution works in CRM 2013 as well as CRM 2015, and works on any entities. You can also add the HTML editor to the same form multiple times, each referencing different fields.

To download this package, check out the solution on CodePlex: https://crmhtmleditor.codeplex.com

A common requirement is to open a dialog process from JavaScript on click of a command bar button etc. This is quite easy to do, simply using window.open and passing in the right parameters to get the dialog working with the right record.

The problem is that this doesn’t allow us to run code when the dialog closes. We could use modal dialogs, but these are not supported in Chrome. Instead what I’ve done is created a manageable function for running a dialog, which allows us to run code when the dialog is closed.

To download the JavaScript library, check out the project on CodePlex: https://processjs.codeplex.com/

It works by popping the dialog in a CRM light-box, which makes it look natural and seamless. When the dialog is closed, a callback function which we specify can be executed.

If the code runs inside outlook, where CRM light-boxes are not supported, a modal dialog is instead used, which still allows us to run our callback function when the dialog closes.

Call Dialog

Opens the specified dialog for a particular record in a CRM light-box, or Modal Dialog if run from Outlook. Once the dialog is closed, a custom callback function can be executed, e.g. to refresh the form with new data set by the dialog.

Parameters: Dialog ID/Guid, Entity Name, Record ID/Guid, Callback function, CRM Base URL (not required on forms/views)

Process.callDialog("C50B3473-F346-429F-8AC7-17CCB1CA45BC", "contact", 
    Xrm.Page.data.entity.getId(),         
    function () { 
        Xrm.Page.data.refresh(); 
    });


To download the JavaScript library, check out the project on CodePlex: https://processjs.codeplex.com/

In my previous blog post I introduced a new JavaScript library for calling processes, and I showed the function for calling a workflow. In this blog post I’m going to look at the function for calling an action.

Actions can be very useful when coupled with JavaScript, as it means we can execute complex server side logic, access fields from related records, or execute C# code using custom workflow activities right from within our JavaScript. The problem is, similar to calling workflows, we need to create a massive ugly SOAP request every time we want to call an action. With actions however, we also need to think about what parameters we’re passing to the action, and what output parameters we’re getting back.

For these reasons, it’s much easier to manage this in a library which we can easily call, and don’t have to worry about remembering the correct format for creating the requests.

To download the JavaScript library, check out the project on CodePlex: https://processjs.codeplex.com/

Call Action

Calls the specified action and returns the response from the action asynchronously. Useful when needing to run C# code from web resources or command bar buttons when only JavaScript is available.

Parameters: Action Unique Name, Input Parameters (array), Success Callback (function), Error Callback (function), CRM Base URL (not required on forms/views)

Each Input Parameter object should contain key, value, and type. Types are defined by Process.Type enum. EntityReference values should be an object containing id and entityType.

The Success Callback function should accept 1 argument which is an array of output parameters, each containing key, and value

Process.callAction("new_dosomething",
    [{
        key: "Target",
        type: Process.Type.EntityReference,
        value: { id: Xrm.Page.data.entity.getId(), entityType: "account" }
    },
    {
        key: "Input1",
        type: Process.Type.String,
        value: "Something"
    }],
    function (params) {
        // Success
        for (var i = 0; i < params.length; i++) {
            alert(params[i].key + "=" + params[i].value);
        }
    },
    function (e) {
        // Error
        alert(e);
    }
);


We can see the action here, which takes 1 string input parameter (plus the Target account reference, since this action isn’t global), and then returns 1 string output parameter. The output parameter includes the input parameter to prove that the action is receiving the input parameters correctly.

When the action is called, we can see the success callback function firing and alerting the output parameter, including the input parameter we passed to the action.

To download the JavaScript library, check out the project on CodePlex: https://processjs.codeplex.com/

In a recent project I worked on, we needed to display a hyperlink in the form notification so that a user could click on it to open up an external webpage with parameters from the form. This proved to be a lot more difficult than initially anticipated, as CRM does not render any HTML tags that you pass into its setFormNotification function. This meant we needed some way of editing the HTML of the notification, which of course is unsupported. We also found that CRM re-renders the form notifications without warning when certain things happen, such as when the form is saved, or when additional notifications are added/removed. This meant any custom HTML was wiped randomly without any way to control it.

Because of these limitations, I decided to just create my own notification bar, using all the existing features available to the Xrm.Page.ui.setFormNotification SDK function, but also added a whole range of new features outlined below.

To download this package, check out the solution on CodePlex: https://notifyjs.codeplex.com/

Features

  • Any existing code using Xrm.Page.ui.setFormNotification and Xrm.Page.ui.clearFormNotification can easily be updated to use Notify.add and Notify.remove without the need to modify any parameters, and without any noticeable differences
  • Allows you to add buttons and/or hyperlinks into the notification, with custom JavaScript triggered on click
  • Supports additional icons, including SUCCESS, QUESTION, and LOADING
  • Supports custom HTML tags to be used manually in the notification message for greater flexibility
  • Ability to manually close a notification using the ‘X’ on the right hand side
  • Has smooth slide in and out transitions when adding and removing notifications
  • Ability to specify a duration after which that particular notification will disappear
  • Supports displaying notifications inside views from command bar buttons (only in web client – must specify duration)

Add Notification

Adds or overwrites a notification on the custom notification bar. Note that this notification bar is separate to the CRM Notification bar.

Parameters: Message, Icon, Unique ID, Buttons (array), Duration (seconds – optional)

All parameters are technically optional. If there’s no icon specified the icon will be removed. If the unique ID is not specified, the ID will be null (and any new notifications with no ID will overwrite that one). The buttons are optional and will display after the message in the order they are added to the array. Duration is optional, and if not specified the notification will only disappear if the user manually dismisses it or if other code removes it.

Supported Icon types are: “INFO”, “WARNING”, “ERROR”, “SUCCESS”, “QUESTION”, “LOADING”

Each button object in the array should have a ‘text’ to display on the button or hyperlink, a ‘callback’ function to call when the button or hyperlink is clicked, and optionally a ‘type’ of ‘link’ or ‘button’ (defaults to button if not specified)

Notify.add("Would you like to create a new Sale?", "QUESTION", "sale",
    [{
        type: "button",
        text: "Create Sale",
        callback: function () {
            Notify.add("Sale created successfully!", "SUCCESS", "sale", null, 3);
        }
    },
    {
        type: "link",
        text: "Not now",
        callback: function () {
            Notify.remove("sale");
        }
    }]);


Remove Notification

This function removes one or all notifications from the custom notification bar. If an ID of a notification is passed to this function, that notification will be removed. If no ID is passed to this function, all notifications will be removed.

Parameters: Unique ID (optional)

// Remove a single notification
Notify.remove("sale");

// Remove all notifications
Notify.remove();


To download this package, check out the solution on CodePlex: https://notifyjs.codeplex.com/

In the past if you’ve needed to call a workflow from JavaScript, you need to build a massive XML SOAP request making sure to pass in the correct attributes and conditions to get the request working.

This is tedious and messy, especially when there are many places you need to do this in a solution. It’s also not good if something breaks in the future and you need to go back and fix up all instances of where the code is being used.

For these reasons, I’ve created a JavaScript library to simplify calling processes, and to make the code manageable going forward. But most of all, it’s so I don’t have to keep finding the correct way to build the SOAP requests!

This library includes functions for calling workflows, actions, and even popping dialogs. For this blog post, I’ll just look at calling workflows. I’ll cover calling actions and dialogs in other posts.

To download the JavaScript library, check out the project on CodePlex: https://processjs.codeplex.com/

Call Workflow

Runs the specified workflow for a particular record asynchronously. Optionally, you can add callback functions which will fire when the workflow has been executed successfully or if it fails.

Parameters: Workflow ID/Guid, Record ID/Guid, Success Callback (function), Error Callback (function), CRM Base URL (not required on forms/views)

Process.callWorkflow("4AB26754-3F2F-4B1D-9EC7-F8932331567A", 
    Xrm.Page.data.entity.getId(),
    function () {
        alert("Workflow executed successfully");
    },
    function () {
        alert("Error executing workflow");
    });

CRM 2013 introduced light-boxes for most popups to make the UI look cleaner with less browser alerts and popups. However, these internal functions were not included in the SDK, so as developers we couldn’t access them for our custom code. Instead, we’ve been forced to use alertDialog and confirmDialog which under the hood just calls the browsers alert and confirm functions.

The main problems with this is that we cannot customize the buttons, and the alerts look ugly.

What I’ve done is created a custom JavaScript library to allow us to create our own light-box popups which look natural and part of CRM. We can now create our own seamless alerts and popups using custom buttons and custom callback functions for each button. We can also specify different types of icons to display in the alerts, instead of being forced to use the alert ‘exclamation mark’ or confirm ‘question mark’.

While technically unsupported, this code is manageable if it ever does break in future CRM releases, so it will be as simple as updating the solution files and everything will just work. In the event that the CRM Lightbox doesn’t work or isn’t supported (like in outlook), a modalDialog will be displayed.

How it Works

Download and install the unmanaged solution from CodePlex: https://alertjs.codeplex.com/, then simply add a reference to mag_/js/alert.js wherever you want to use the custom alerts. This will work from forms, views, command bars, and pretty much anywhere in CRM that supports JavaScript.

Next simply call the Alert.show function. All other dependent web resources will be loaded automatically.

Parameters: Title (main message), Subtitle (smaller message), Buttons (array), Icon, Width (px), Height (px), CRM Base URL

All the parameters are technically optional. If no buttons are specified, a default ‘OK’ button with no callback will be added. If no icon is specified, then no icon will be displayed. If height is not specified, it will default to 225. If width is not specified it will default to 450. The URL only needs to be specified if the alert is being called from somewhere that doesn’t have Xrm.Page access (e.g. web resource).

Each button object in the buttons array needs to have a ‘label’ (text displayed on the button), and optionally a ‘callback’ (function called if the button is clicked).

The following icons are supported: “INFO”, “WARNING”, “ERROR”, “SUCCESS”, “QUESTION”.

Alert.show("Would you like to create a new Sale?", null,
    [{
        label: "Create Sale",
        callback: function () {
            Alert.show("Sale created successfully!", null, null, "SUCCESS", 500, 200);
        }
    },
    {
        label: "Not now"
    }], "QUESTION", 500, 200);


To download this package, check out the solution on CodePlex: https://alertjs.codeplex.com/

In Dynamics CRM every now and then users may encounter errors like the one below. These are typically random errors with Microsoft scripts that usually do not affect any functionality.

We’re prompted with the option to ‘Send Error Report’ to Microsoft so they can fix the bug if enough reports of the same issue come through, or we can click ‘Don’t Send’ and it will just close the dialog box and ignore the error. This dialog can be useful for customizers, but it is unnecessary to show to general users.

Each user can define their preferences for displaying these error messages in their Personal Options under the Privacy tab. By default it is set to ask us every time whether to send an error report or not. We can also select to automatically send the errors, or to never send the errors. Usually this is changed for everyone to automatically send or never send so that the dialog boxes do not show up.

What some people don’t know, is that we can define these preferences at a global level, so that each user doesn’t need to go into their personal options to make this change, and new users won’t need to see those popups by default.

To change this setting globally, go into System Settings, Administration, and click on Privacy Preferences.

On the Error Reporting tab, we can tick the box to specify the error preferences for all users, and then select whether to automatically send, never send, or prompt every time.

Once this change has been made, users will no longer see the Privacy tab in their personal options, and they will not be able to change this setting. Any new users that get created, as well as all existing users, will have these preferences automatically.

One thing to note is that as this is not a part of System Settings, you cannot deploy these preferences in a solution, so you’ll need to configure this in each CRM system.

If you’re seeing an error similar to the one above, you’ve probably done a database backup and restore from a CRM 2013 instance into a new CRM 2013 or 2015 instance. This error will pop up when you try and modify a user’s email address, or open personal options from outlook, as well as when performing some other tasks around CRM that include sensitive data.

The Data Encryption error states: “There are encrypted fields in the organization database, but the data encryption feature isn’t activated. Contact your Microsoft Dynamics CRM system administrator to activate data encryption. To activate, go to System Settings > Data Management > Data Encryption…”

The reason this error occurs is because when we restore/import a database, data encryption is disabled by default, even if it was enabled in the system we took a backup from. This is because the encryption settings are stored in the config database, so the .bak file does not contain these settings.

According to the error, to enable encryption we need to go into Data Encryption under Data Management. However, we can only enable Data Encryption if CRM is using the https protocol, and usually the reason we’ve done a backup/restore is because we’re setting up a Dev or UAT copy of Prod, which may not need to be https.

This error states that “The HTTPS protocol is required for this type of request. Enable the HTTPS protocol and try again.” However, enabling https may not be ideal, and we still need to be able use the system.

Fortunately, there is a SQL script we can run on the config database which will allow us to use data encryption without using the https protocol:

UPDATE [MSCRM_CONFIG].[dbo].[DeploymentProperties]
SET [BitColumn]=1
WHERE ColumnName=’DisableSSLCheckForEncryption’

You shouldn’t do this on a production instance, but for Dev or UAT instances this is necessary.

Once that’s updated you need to do an IISRESET on the CRM server for the changes to take effect.

If we try opening that Data Encryption window again, we should see that encryption is disabled, and we can create a new key and activate it.

You should be able to get the encryption key from the original CRM system you backed up from. If not, then you can simply create a new encryption key.

When you activate, you might be faced with another error which states “Please select an account that is a member of the PrivUserGroup security group and try again”.

This is because although we might be a system admin in CRM, we cannot update the encryption key unless we are a member of the PrivUserGroup in Active Directory. We can either log into CRM as the user who installed CRM, or we can get our user added to that security group.

Once that’s done we should now be able to activate the encryption key.

You should now be able to edit user email addresses, and perform any other operations that require data encryption without any errors.

NOTE: This encryption error only happens when we restore from a CRM 2013 or 2015 backup. If we create a new org through Deployment Manager, or if we upgrade a CRM 2011 database, encryption will still be enabled by default. We can see when creating a new org the wizard informs us that encryption will be enabled.